
Table of Contents
Thanksgiving is just around the corner, and what better way to celebrate than with the best Thanksgiving desserts?
We have collected some of our favourites, from the quick and easy to the slightly more daring, and from healthy to decadent and everything in between.
There’s something for every Thanksgiving Day table on this list!
Best Thanksgiving Desserts
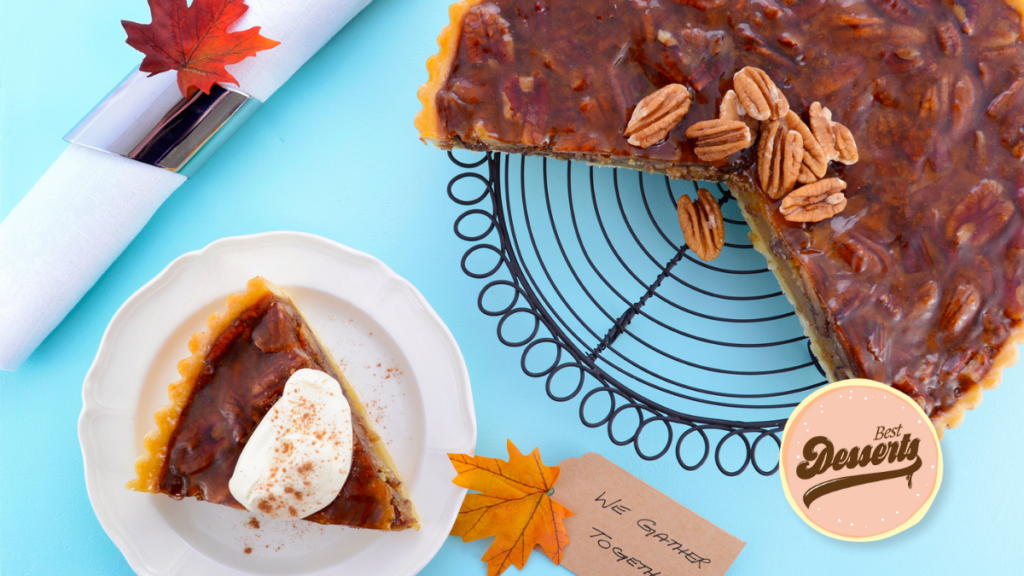
The Ultimate Pecan Pie
Mix together the flour, butter, and salt in a large bowl. Use a pastry blender or two knives and cut in butter until mixture becomes similar to coarse crumbs with some larger lumps.
Put 2 tablespoons ice water evenly over mixture and gently stir with a fork until everything is fused together. To test the dough, squeeze some dough together to make a small ball. Add more water, 1/2 tablespoon at a time and test again if the dough does not hold together.
Form the dough into a ball (be cautious not to overwork the dough) and press it flat into a disc.
Use a plastic wrap to wrap the disc tightly and chill or refrigerate for at least 1 hour.
Preheat oven to 350 F (176 C).
Lightly spread some flour on a flat surface and with a lightly floured rolling pin, roll out the chilled pie crust dough into a 12-inch circle. Center and fit the dough into a 9-inch pie plate trimming the dough to a 1-inch overhang and fold it over to form a rim. Pinch the rim with your fingers to create a crimped edge. You can also use a fork to press down on the rim forming an edge. Then lightly puncture the bottom all over with a fork (helps to release the air during baking). Chill the pie plate in the refrigerator.
Whisk together the melted butter and brown sugar until smooth in a large bowl. Whisk in the eggs, corn syrup, vanilla, cinnamon and salt until combined. Put and mix in the pecans and carefully pour pie filling into chilled pie crust.
Bake the prepared pie for 40 to 50 minutes until the top of the pie becomes golden and the filling has set (it should slightly jiggle when you shake the pie dish gently). After 20 minutes of baking, cover the pie loosely with foil to prevent the crust from excessive browning.
Allow the pie to cool completely for several hours then serve the pie with whipped cream or ice cream.
Ingredients
Directions
Mix together the flour, butter, and salt in a large bowl. Use a pastry blender or two knives and cut in butter until mixture becomes similar to coarse crumbs with some larger lumps.
Put 2 tablespoons ice water evenly over mixture and gently stir with a fork until everything is fused together. To test the dough, squeeze some dough together to make a small ball. Add more water, 1/2 tablespoon at a time and test again if the dough does not hold together.
Form the dough into a ball (be cautious not to overwork the dough) and press it flat into a disc.
Use a plastic wrap to wrap the disc tightly and chill or refrigerate for at least 1 hour.
Preheat oven to 350 F (176 C).
Lightly spread some flour on a flat surface and with a lightly floured rolling pin, roll out the chilled pie crust dough into a 12-inch circle. Center and fit the dough into a 9-inch pie plate trimming the dough to a 1-inch overhang and fold it over to form a rim. Pinch the rim with your fingers to create a crimped edge. You can also use a fork to press down on the rim forming an edge. Then lightly puncture the bottom all over with a fork (helps to release the air during baking). Chill the pie plate in the refrigerator.
Whisk together the melted butter and brown sugar until smooth in a large bowl. Whisk in the eggs, corn syrup, vanilla, cinnamon and salt until combined. Put and mix in the pecans and carefully pour pie filling into chilled pie crust.
Bake the prepared pie for 40 to 50 minutes until the top of the pie becomes golden and the filling has set (it should slightly jiggle when you shake the pie dish gently). After 20 minutes of baking, cover the pie loosely with foil to prevent the crust from excessive browning.
Allow the pie to cool completely for several hours then serve the pie with whipped cream or ice cream.
Notes
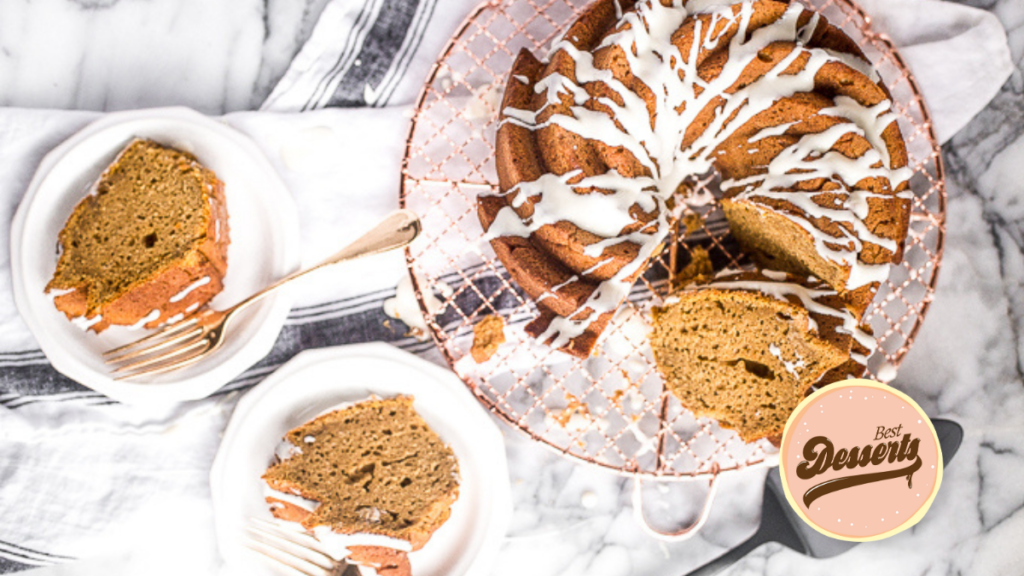
Thanksgiving Bundt Cake with Cream Cheese Glaze
Preheat oven to 350 F.
Lubricate the inside of a Bundt cake pan with baking spray.
For about 3 minutes, cream the butter and brown sugar together in the bowl of a stand mixer with paddle attachment fitted (or in a large bowl using a hand mixer).
Just one at a time, add vanilla extract and eggs, scraping down the sides between additions.
By whisking, combine pastry flour, baking powder, baking soda, and salt in a separate bowl.
Add half of the flour mixture to the butter and sugar that was prepared, then mix until flour is completely fused together. Add Greek yoghurt and mix to combine. Then add remaining flour, scraping down sides after adding.
Pour mixture into prepared Bundt cake pan, then gently smooth the top with the back of a spatula.
Bake for 35 minutes, or until you see that the cake is golden brown on the outside and springs back a little when you try to push on it.
Rest and let cool in pan for at least 15 minutes, then overturn onto a wire rack to cool completely before adding glaze.
Combine all needed ingredients for the glaze in a small bowl, then whisk until you have a smooth consistency. Add water at about 1 teaspoon at a time, and whisk until desired thickness is attained.
Drizzle on top of cooled cake.
Ingredients
Directions
Preheat oven to 350 F.
Lubricate the inside of a Bundt cake pan with baking spray.
For about 3 minutes, cream the butter and brown sugar together in the bowl of a stand mixer with paddle attachment fitted (or in a large bowl using a hand mixer).
Just one at a time, add vanilla extract and eggs, scraping down the sides between additions.
By whisking, combine pastry flour, baking powder, baking soda, and salt in a separate bowl.
Add half of the flour mixture to the butter and sugar that was prepared, then mix until flour is completely fused together. Add Greek yoghurt and mix to combine. Then add remaining flour, scraping down sides after adding.
Pour mixture into prepared Bundt cake pan, then gently smooth the top with the back of a spatula.
Bake for 35 minutes, or until you see that the cake is golden brown on the outside and springs back a little when you try to push on it.
Rest and let cool in pan for at least 15 minutes, then overturn onto a wire rack to cool completely before adding glaze.
Combine all needed ingredients for the glaze in a small bowl, then whisk until you have a smooth consistency. Add water at about 1 teaspoon at a time, and whisk until desired thickness is attained.
Drizzle on top of cooled cake.
Notes
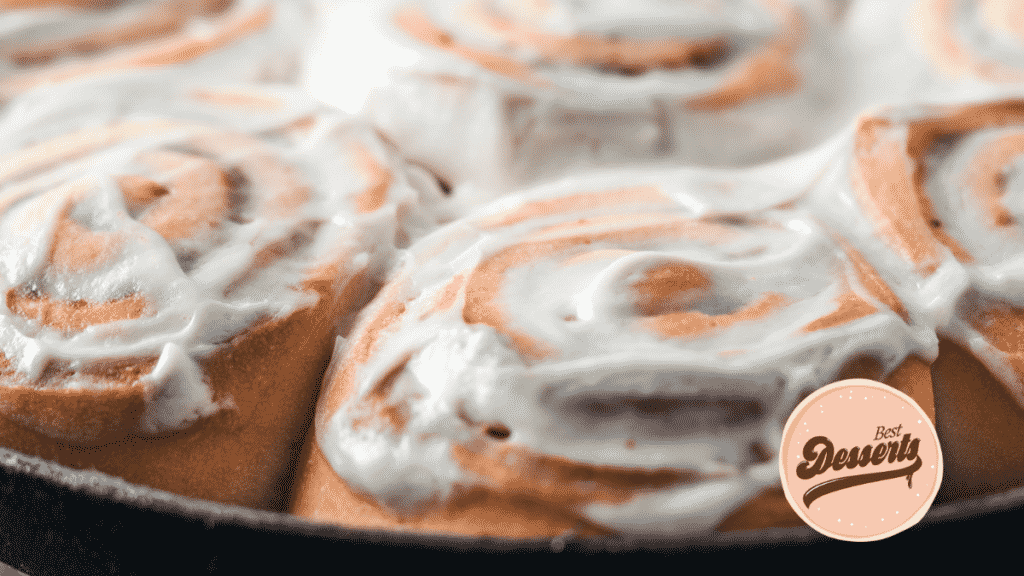
Pumpkin Cinnamon Rolls
Dissolve yeast and sugar in milk in a large bowl and stir to blend together. Let the mixture rest for 5 minutes. This will allow the yeast to activate.
Mix in together the pumpkin puree, softened butter, flour, salt and egg. Stir thoroughly with a spatula until no dry flour particles are visible. Make sure to scrape off any remaining flour from the sides of the bowl.
Move the dough onto a clean and dry surface. Knead the dough for 5 minutes until it turns into a soft and smooth dough ball. The dough becomes much easier to knead by hand because of its high fat content.
Move the dough back into the mixing bowl
Using a brush, lightly grease the dough ball with vegetable oil and cover with a lid or a plastic cover.
Allow the dough to rise at room temperature about an hour or until it doubles in size. It is best to cover the dough with oil to avoid losing moisture and drying out.
Move the dough on a floured surface and roll the dough to a rectangle of about 20x12 inches wide using a rolling pin. Lightly spread softened butter uniformly over the rolled dough.
Whisk and blend together brown sugar, ground cinnamon and pumpkin pie spice mixture in a small bowl. Sprinkle the mixture equally over the top of the butter.
Tightly roll up the dough into a log and firmly pinch the end edges to seal.
Cut the roll into nine (9) equal pieces using a knife or bench scraper, about 2 inches wide each. Place the rolls flat on their side into a greased 8x8 inch pan.
Cover and seal the pan with plastic wrap and let it rise (second rise) for an hour or until the rolls double in size.
Transfer the pan to the preheated oven at 350 F and bake for 30 minutes, until golden brown.
Let it cool and rest for 10 minutes.
Mix together the milk, cream cheese, honey and confectioners' sugar in a bowl and mix well with a handheld mixer, or a whisk, until the mixture becomes smooth.
Carefully drizzle the cream cheese icing over cinnamon rolls.
Serve.
1. In sealing or covering the dough for its second rise, you may also use a large Ziploc bag. Put the whole 8x8 inch pan inside.
2. You may opt to use a round pan instead of a square pan. This will give your set of rolls a different look
3. If you don’t intend to bake the rolls right away, you may leave it in the refrigerator overnight.
Ingredients
Directions
Dissolve yeast and sugar in milk in a large bowl and stir to blend together. Let the mixture rest for 5 minutes. This will allow the yeast to activate.
Mix in together the pumpkin puree, softened butter, flour, salt and egg. Stir thoroughly with a spatula until no dry flour particles are visible. Make sure to scrape off any remaining flour from the sides of the bowl.
Move the dough onto a clean and dry surface. Knead the dough for 5 minutes until it turns into a soft and smooth dough ball. The dough becomes much easier to knead by hand because of its high fat content.
Move the dough back into the mixing bowl
Using a brush, lightly grease the dough ball with vegetable oil and cover with a lid or a plastic cover.
Allow the dough to rise at room temperature about an hour or until it doubles in size. It is best to cover the dough with oil to avoid losing moisture and drying out.
Move the dough on a floured surface and roll the dough to a rectangle of about 20x12 inches wide using a rolling pin. Lightly spread softened butter uniformly over the rolled dough.
Whisk and blend together brown sugar, ground cinnamon and pumpkin pie spice mixture in a small bowl. Sprinkle the mixture equally over the top of the butter.
Tightly roll up the dough into a log and firmly pinch the end edges to seal.
Cut the roll into nine (9) equal pieces using a knife or bench scraper, about 2 inches wide each. Place the rolls flat on their side into a greased 8x8 inch pan.
Cover and seal the pan with plastic wrap and let it rise (second rise) for an hour or until the rolls double in size.
Transfer the pan to the preheated oven at 350 F and bake for 30 minutes, until golden brown.
Let it cool and rest for 10 minutes.
Mix together the milk, cream cheese, honey and confectioners' sugar in a bowl and mix well with a handheld mixer, or a whisk, until the mixture becomes smooth.
Carefully drizzle the cream cheese icing over cinnamon rolls.
Serve.
1. In sealing or covering the dough for its second rise, you may also use a large Ziploc bag. Put the whole 8x8 inch pan inside.
2. You may opt to use a round pan instead of a square pan. This will give your set of rolls a different look
3. If you don’t intend to bake the rolls right away, you may leave it in the refrigerator overnight.
Notes
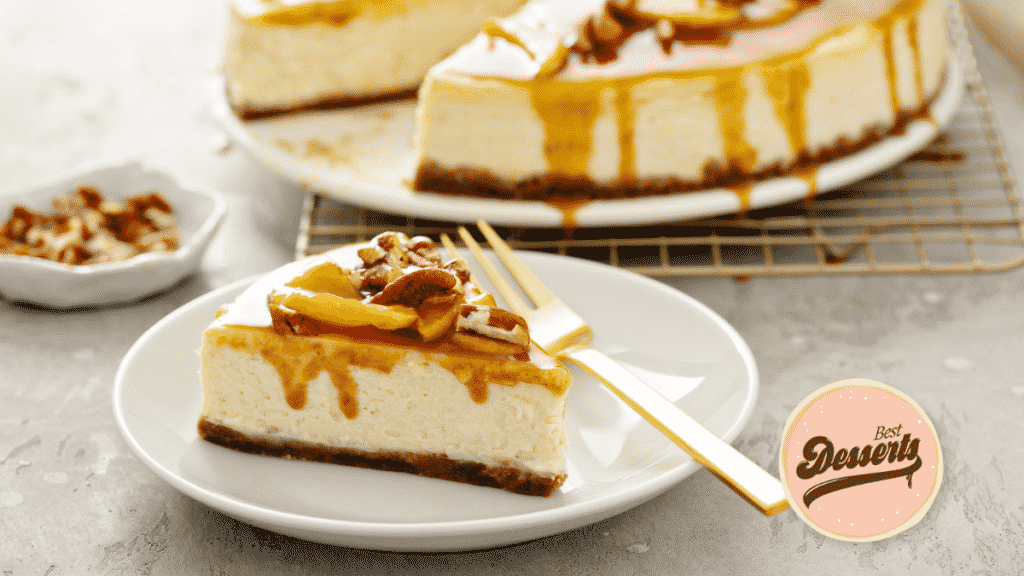
Caramel Apple Fall Cheesecake
Preheat oven to 350 F.
Mix and stir together graham cracker crumbs and sugar in a large bowl while gradually pouring in the melted butter.
Stir continually until mixed.
Press flat the crumbs tightly into an 8-inch springform pan.
Bake the crust for 10 minutes. The crust should be allowed to cool and rest for at least an hour before placing the filling.
Using a hand mixer, mix together the cream cheese, yoghurt, sugar and vanilla extract in a large bowl until well blended.
Add 1 egg at a time and beat just until mixed together.
Continue and repeat this step until all eggs are blended (NOTE: Overmixing will result in cracking during baking).
Transfer the filling into the cooled crust and smooth out the top surface.
Wrap the outside of the springform pan tightly with aluminium foil to prevent any leaks and place the pan in a large baking dish. Fill the baking dish with 1 inch of boiling water.
Transfer the baking dish to the oven and bake for 1 hour in the boiling water bath (the purpose for this is to prevent sudden temperature drop which might result in cracking).
Turn off the heat after an hour and leave the cheesecake inside the oven for another hour. The cheesecake will continue to bake during this time due to stored heat inside the oven and the boiling water.
Carefully remove the pan out of the oven and loosen the cheesecake from the sides of the pan using a paring (NOTE: a non-metal knife would be better to protect your pan from any scratches)
Cover the pan with plastic wrap and move to the refrigerator to leave overnight.
Prepare the caramel apple topping. Melt the butter in a saucepan over medium-high heat. Add sliced apples and stir gently until they are coated with melted butter. Stir in brown sugar and mix until dissolved. Cook for 5 to 10 minutes or until apples are tender. (NOTE: stirring occasionally will make a better consistency)
Adding toppings to your cheesecake will enhance its appearance. Drizzle desired caramel sauce on top of your cheesecake. Arrange the sliced apples in a way that you desire. It can be like a floral-type or anything that will make it look very attractive.
Sprinkle a handful of sliced almonds around the outer edge of the cake. You may also use pecans. To make your cake look lively, you may also put cherries, especially in the center.
Ingredients
Directions
Preheat oven to 350 F.
Mix and stir together graham cracker crumbs and sugar in a large bowl while gradually pouring in the melted butter.
Stir continually until mixed.
Press flat the crumbs tightly into an 8-inch springform pan.
Bake the crust for 10 minutes. The crust should be allowed to cool and rest for at least an hour before placing the filling.
Using a hand mixer, mix together the cream cheese, yoghurt, sugar and vanilla extract in a large bowl until well blended.
Add 1 egg at a time and beat just until mixed together.
Continue and repeat this step until all eggs are blended (NOTE: Overmixing will result in cracking during baking).
Transfer the filling into the cooled crust and smooth out the top surface.
Wrap the outside of the springform pan tightly with aluminium foil to prevent any leaks and place the pan in a large baking dish. Fill the baking dish with 1 inch of boiling water.
Transfer the baking dish to the oven and bake for 1 hour in the boiling water bath (the purpose for this is to prevent sudden temperature drop which might result in cracking).
Turn off the heat after an hour and leave the cheesecake inside the oven for another hour. The cheesecake will continue to bake during this time due to stored heat inside the oven and the boiling water.
Carefully remove the pan out of the oven and loosen the cheesecake from the sides of the pan using a paring (NOTE: a non-metal knife would be better to protect your pan from any scratches)
Cover the pan with plastic wrap and move to the refrigerator to leave overnight.
Prepare the caramel apple topping. Melt the butter in a saucepan over medium-high heat. Add sliced apples and stir gently until they are coated with melted butter. Stir in brown sugar and mix until dissolved. Cook for 5 to 10 minutes or until apples are tender. (NOTE: stirring occasionally will make a better consistency)
Adding toppings to your cheesecake will enhance its appearance. Drizzle desired caramel sauce on top of your cheesecake. Arrange the sliced apples in a way that you desire. It can be like a floral-type or anything that will make it look very attractive.
Sprinkle a handful of sliced almonds around the outer edge of the cake. You may also use pecans. To make your cake look lively, you may also put cherries, especially in the center.
Notes
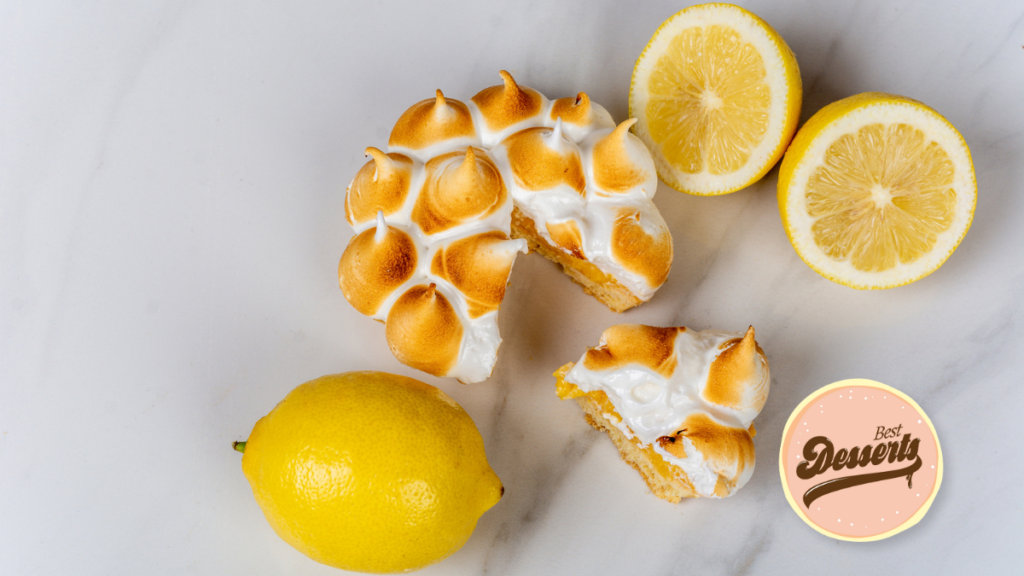
Lemon Meringue Tartlets
Using a food processor, pulse graham crackers into fine crumbs. Add butter and pulse again to mix together.
Equally split the mixture among six 4-inch tart pans with removable bottoms; press firmly on bottoms and up sides.
Freeze until firm for at least 30 minutes.
In a medium saucepan, combine the cream and sugar and cook on medium to high heat. Continue stirring for 5 minutes. Let it boil, then reduce heat and simmer 1 minute.
Remove the saucepan from heat then add the lemon zest and juice.
Allow to cool for 20 minutes, then equally distribute among crust-lined tart shells and refrigerate until set for at least 2 hours or up to 24 hours.
In a large mixing bowl, whisk together the egg whites, sugar and cream of tartar.
Put the bowl over a saucepan of simmering water to cook the mixture.
Whisking constantly, until sugar has dissolved and whites are very warm to the touch (not hot and overcooked). Continue the process for 5 minutes.
Remove from heat and using an electric mixer, beat on low speed, gradually increasing to high, until glossy, soft peaks form. Do it for about 5 minutes.
Beat in vanilla. Spoon over tarts, then use a torch to lightly toast.
Ingredients
Directions
Using a food processor, pulse graham crackers into fine crumbs. Add butter and pulse again to mix together.
Equally split the mixture among six 4-inch tart pans with removable bottoms; press firmly on bottoms and up sides.
Freeze until firm for at least 30 minutes.
In a medium saucepan, combine the cream and sugar and cook on medium to high heat. Continue stirring for 5 minutes. Let it boil, then reduce heat and simmer 1 minute.
Remove the saucepan from heat then add the lemon zest and juice.
Allow to cool for 20 minutes, then equally distribute among crust-lined tart shells and refrigerate until set for at least 2 hours or up to 24 hours.
In a large mixing bowl, whisk together the egg whites, sugar and cream of tartar.
Put the bowl over a saucepan of simmering water to cook the mixture.
Whisking constantly, until sugar has dissolved and whites are very warm to the touch (not hot and overcooked). Continue the process for 5 minutes.
Remove from heat and using an electric mixer, beat on low speed, gradually increasing to high, until glossy, soft peaks form. Do it for about 5 minutes.
Beat in vanilla. Spoon over tarts, then use a torch to lightly toast.
Notes
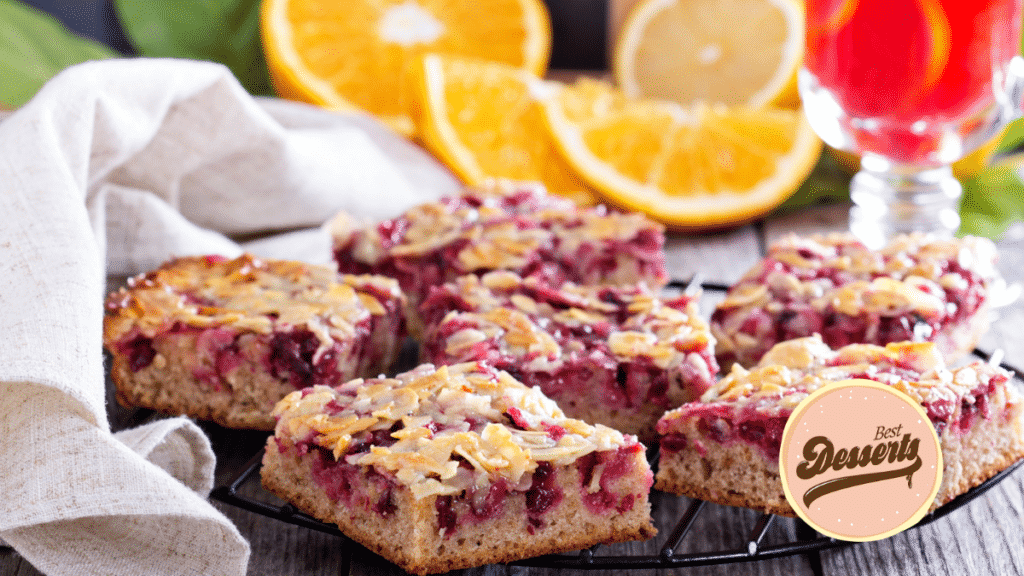
Cranberry Sauce Oat Bars
Preheat oven to 350 F.
In a large bowl, cream 3/4 cup of butter with 3/4 cup of brown sugar until light and fluffy using a hand or a stand mixer.
Add 1 and 1/2 cups of rolled oats, flour, vanilla, baking powder, and salt to the mixture. Continue to blend until fully combined. The mixture should resemble crumbs.
Move the mixture into a 9x9-inch baking pan, and tightly press it in to create an even layer on the bottom. Spread cranberry sauce on top to create the topmost layer.
In a saucepan, melt 3 tablespoons of butter over medium heat. Then remove from heat once melted and stir in the remaining 1/4 cup brown sugar, 1/2 cup oats, pecans, and cinnamon. Stir until fully integrated. Sprinkle and equally distribute the topping on top of the layer of cranberry sauce.
Bake for 30 to 35 minutes until the mixture becomes lightly browned. Place on a wire rack to cool down and rest then cut into 9 squares.
Enjoy!
Ingredients
Directions
Preheat oven to 350 F.
In a large bowl, cream 3/4 cup of butter with 3/4 cup of brown sugar until light and fluffy using a hand or a stand mixer.
Add 1 and 1/2 cups of rolled oats, flour, vanilla, baking powder, and salt to the mixture. Continue to blend until fully combined. The mixture should resemble crumbs.
Move the mixture into a 9x9-inch baking pan, and tightly press it in to create an even layer on the bottom. Spread cranberry sauce on top to create the topmost layer.
In a saucepan, melt 3 tablespoons of butter over medium heat. Then remove from heat once melted and stir in the remaining 1/4 cup brown sugar, 1/2 cup oats, pecans, and cinnamon. Stir until fully integrated. Sprinkle and equally distribute the topping on top of the layer of cranberry sauce.
Bake for 30 to 35 minutes until the mixture becomes lightly browned. Place on a wire rack to cool down and rest then cut into 9 squares.
Enjoy!
Notes
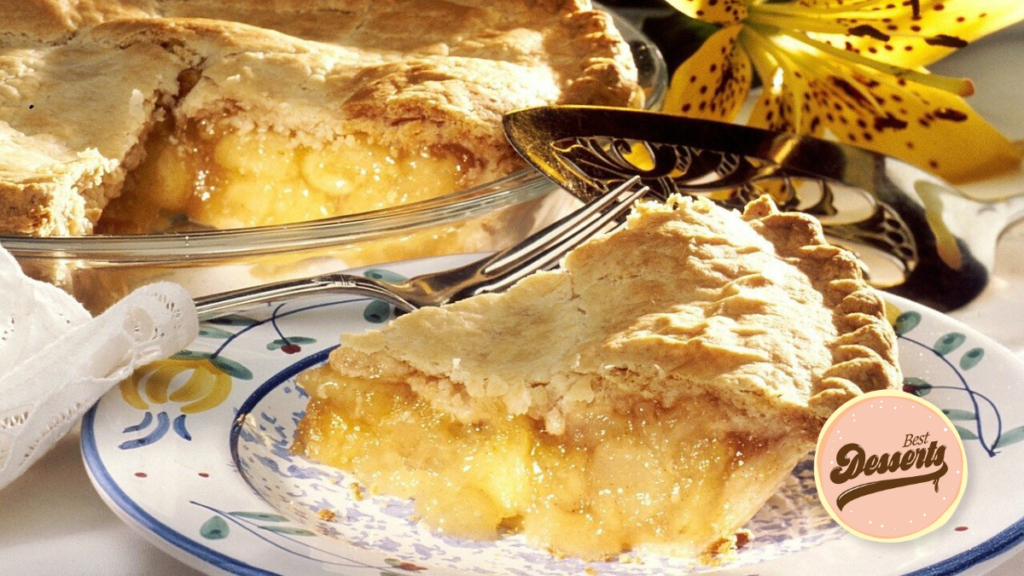
Grandma’s Apple Pie
Brush each sheet of pastry with water, then sprinkle with caster sugar.
Pair pastry sheets, sugar side in. Roll pastry lightly to increase its size by 20 per cent and to seal. Line a 22cm pie dish with one rolled pastry pair. Sprinkle 1cm of breadcrumbs over the base.
Peel and core apples 7 apples. Cut into 2mm-thick slices and put into a large bowl. Combine the apples, brown sugar, cinnamon, nutmeg and allspice and then layer into the pastry shell. Top with the pieces of butter.
Lay the second pastry pair over the top. Crimp the edges to seal and remove any excess pastry. Brush the top of the apple pie with beaten egg, then sprinkle all over with brown sugar. Cut a small slot or cross into the top of the pie.
Bake pie for 40-45 minutes or when pastry turns golden. Remove and place on wire rack for 20 minutes before serving with ice cream or thickened cream.
Ingredients
Directions
Brush each sheet of pastry with water, then sprinkle with caster sugar.
Pair pastry sheets, sugar side in. Roll pastry lightly to increase its size by 20 per cent and to seal. Line a 22cm pie dish with one rolled pastry pair. Sprinkle 1cm of breadcrumbs over the base.
Peel and core apples 7 apples. Cut into 2mm-thick slices and put into a large bowl. Combine the apples, brown sugar, cinnamon, nutmeg and allspice and then layer into the pastry shell. Top with the pieces of butter.
Lay the second pastry pair over the top. Crimp the edges to seal and remove any excess pastry. Brush the top of the apple pie with beaten egg, then sprinkle all over with brown sugar. Cut a small slot or cross into the top of the pie.
Bake pie for 40-45 minutes or when pastry turns golden. Remove and place on wire rack for 20 minutes before serving with ice cream or thickened cream.
Notes
Chocolate Fudge Brownies
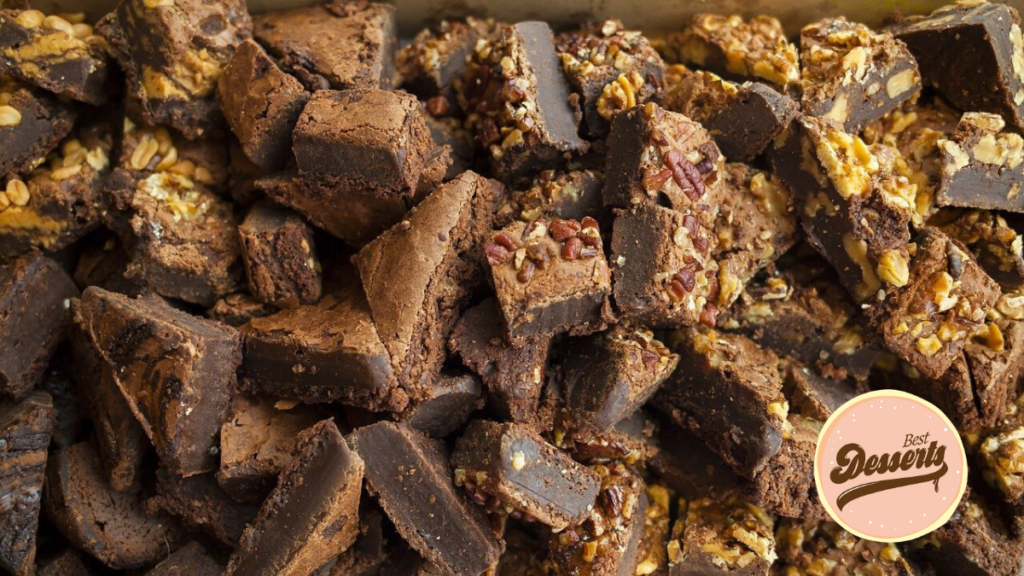
Preheat oven to 190 degrees C. Grease a 20x30cm baking pan. Place 250g chocolate with 250g butter in a microwave-safe bowl, and microwave on High until the chocolate is soft and the butter has melted, about 2 minutes. Stir to mix.
Place the eggs, 3 cups of sugar, and 1 tablespoon of vanilla essence in a large bowl and beat with an electric mixer on high speed for 2 minutes. Reduce the mixer speed to low and beat in the melted butter-chocolate mixture. Beat in the flour until just combined (do not overmix) and stir in the chopped walnuts. Spread the batter in the prepared pan.
Bake in the preheated oven until a toothpick inserted into the centre comes out with fudgy crumbs, about 35 minutes. Cool in the pan before icing.
To make icing, combine 1 1/4 cups of sugar with the thickened cream in a saucepan over medium heat and stir until the sugar dissolves and the mixture begins to simmer, about 3 minutes. Reduce the heat to low, and let the mixture simmer for 7 minutes without stirring.
Remove the cream mixture from the heat, and stir in140g chocolate and 125g butter, stirring to melt and blend the chocolate. Add 1 teaspoon vanilla essence; whisk until smooth. Place the icing in the refrigerator and stir every few minutes until the icing is chilled and thick, about 30 minutes. Frost the cooled brownies and cut into squares.
Ingredients
Directions
Preheat oven to 190 degrees C. Grease a 20x30cm baking pan. Place 250g chocolate with 250g butter in a microwave-safe bowl, and microwave on High until the chocolate is soft and the butter has melted, about 2 minutes. Stir to mix.
Place the eggs, 3 cups of sugar, and 1 tablespoon of vanilla essence in a large bowl and beat with an electric mixer on high speed for 2 minutes. Reduce the mixer speed to low and beat in the melted butter-chocolate mixture. Beat in the flour until just combined (do not overmix) and stir in the chopped walnuts. Spread the batter in the prepared pan.
Bake in the preheated oven until a toothpick inserted into the centre comes out with fudgy crumbs, about 35 minutes. Cool in the pan before icing.
To make icing, combine 1 1/4 cups of sugar with the thickened cream in a saucepan over medium heat and stir until the sugar dissolves and the mixture begins to simmer, about 3 minutes. Reduce the heat to low, and let the mixture simmer for 7 minutes without stirring.
Remove the cream mixture from the heat, and stir in140g chocolate and 125g butter, stirring to melt and blend the chocolate. Add 1 teaspoon vanilla essence; whisk until smooth. Place the icing in the refrigerator and stir every few minutes until the icing is chilled and thick, about 30 minutes. Frost the cooled brownies and cut into squares.
Notes
Swiss Caramel Walnut Tart
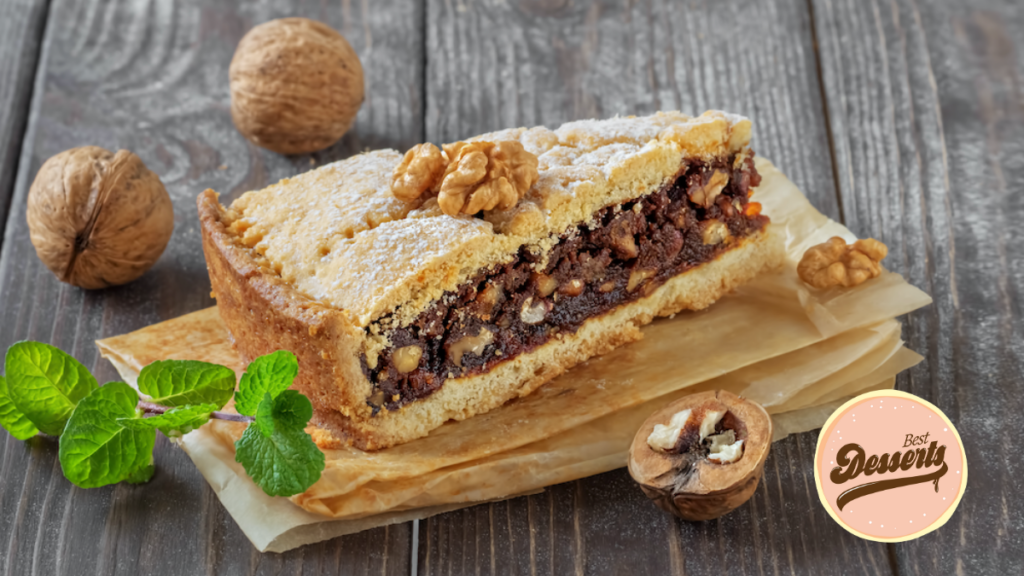
Add flour, sugar and a pinch of salt in a bowl. Add lemon rind by using the Victorinox zester and mix together. Slice your cold butter with a Victorinox Butter & Cheese Knife and work it in the mix to form a crumbly dough. Add one egg and knead until a consistent dough is formed. Cover in plastic wrap and refrigerate for 30 minutes.
In a saucepan, bring sugar, honey and a dash of water to a boil whilst stirring. Keep boiling until caramelised to a light brown colour. Heat the cream and add to the caramel whilst stirring swiftly.
Add walnuts to your saucepan and stir well until the mix forms a thickness. Leave to simmer until it reaches a dark golden consistency, keep stirring occasionally. Take off heat and leave to cool.
Take ⅔ of your chilled dough and place in a greased springform. Cover the base and sides (2-3cm high) with dough using a Victorinox Spatula. Pour in the cooled filling and spread evenly.
Roll the remaining dough to form the lid for the dish. Carefully place the circular dough on top of the filling. Join the edges well by pressing the circumference with a Victorinox Cake Fork. Whisk the last egg yolk and brush lightly on top.
Place in the oven at 180 degrees Celsius for 50-60 mins. When the tart is cooked, place in the fridge to completely cool. Once the filling has chilled, dislodge the tart from the tin with help from the Victorinox Spatula.
Serve your Swiss Engadiner Nusstorte to perfection with the Victorinox Pastry Knife. Take a slice to mum in bed, enjoy together with a cup of tea or indulge in a second and third serving.
Ingredients
Directions
Add flour, sugar and a pinch of salt in a bowl. Add lemon rind by using the Victorinox zester and mix together. Slice your cold butter with a Victorinox Butter & Cheese Knife and work it in the mix to form a crumbly dough. Add one egg and knead until a consistent dough is formed. Cover in plastic wrap and refrigerate for 30 minutes.
In a saucepan, bring sugar, honey and a dash of water to a boil whilst stirring. Keep boiling until caramelised to a light brown colour. Heat the cream and add to the caramel whilst stirring swiftly.
Add walnuts to your saucepan and stir well until the mix forms a thickness. Leave to simmer until it reaches a dark golden consistency, keep stirring occasionally. Take off heat and leave to cool.
Take ⅔ of your chilled dough and place in a greased springform. Cover the base and sides (2-3cm high) with dough using a Victorinox Spatula. Pour in the cooled filling and spread evenly.
Roll the remaining dough to form the lid for the dish. Carefully place the circular dough on top of the filling. Join the edges well by pressing the circumference with a Victorinox Cake Fork. Whisk the last egg yolk and brush lightly on top.
Place in the oven at 180 degrees Celsius for 50-60 mins. When the tart is cooked, place in the fridge to completely cool. Once the filling has chilled, dislodge the tart from the tin with help from the Victorinox Spatula.
Serve your Swiss Engadiner Nusstorte to perfection with the Victorinox Pastry Knife. Take a slice to mum in bed, enjoy together with a cup of tea or indulge in a second and third serving.
Notes
Layered Mocha Chia Pudding Cups
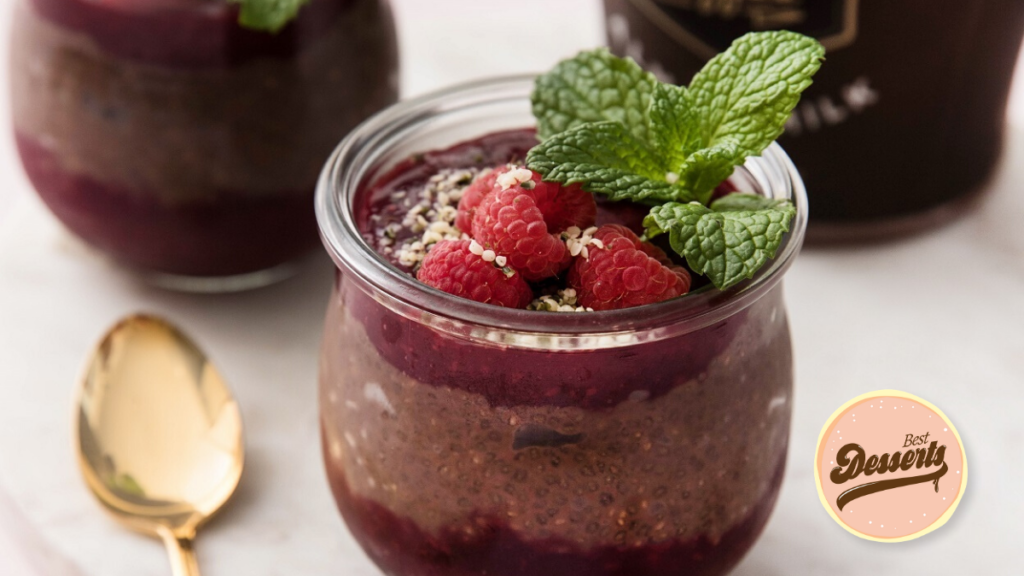
In a medium bowl whisk to combine cold brew, chia seeds, and cocoa powder. Cover and refrigerate overnight.
In a medium saucepan combine 1½ cups raspberries and maple syrup. Bring to a boil, then reduce heat to simmer, stirring frequently, until raspberries are completely broken down. Transfer to a blender and blend until smooth.
Divide half the raspberry puree between 4 small glasses. Whisk chia pudding to break up any clumps, then top raspberry puree with chia mixture. Top with remaining raspberry puree. Garnish with remaining ½ cup raspberries and hemp seeds.
Ingredients
Directions
In a medium bowl whisk to combine cold brew, chia seeds, and cocoa powder. Cover and refrigerate overnight.
In a medium saucepan combine 1½ cups raspberries and maple syrup. Bring to a boil, then reduce heat to simmer, stirring frequently, until raspberries are completely broken down. Transfer to a blender and blend until smooth.
Divide half the raspberry puree between 4 small glasses. Whisk chia pudding to break up any clumps, then top raspberry puree with chia mixture. Top with remaining raspberry puree. Garnish with remaining ½ cup raspberries and hemp seeds.
Notes
Vegan White Chocolate Nectarine Tart
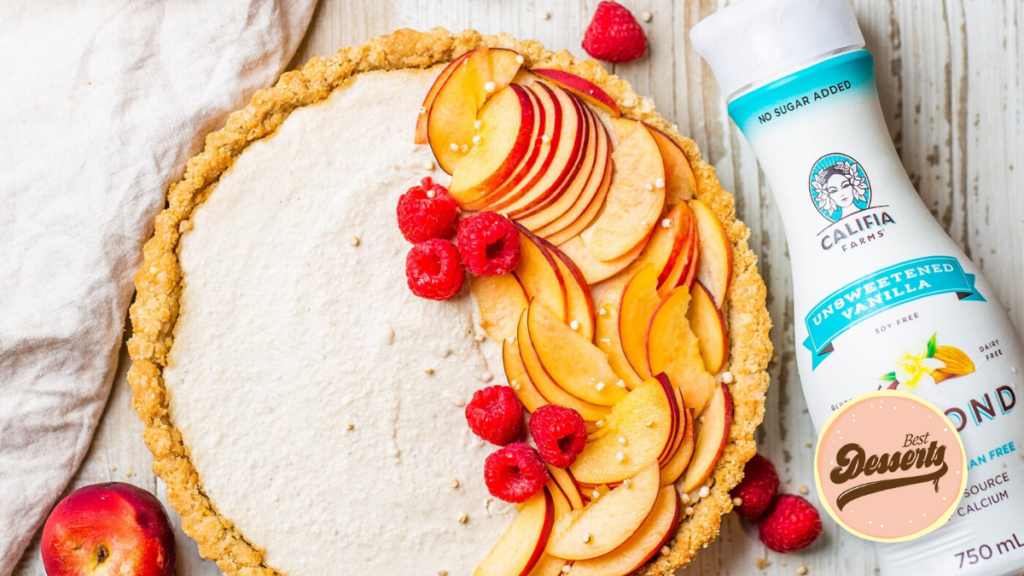
For the base, mix all ingredients in a large bowl until sticky. Press down evenly onto the base and sides of the lightly greased round tart tin.
Bake in the oven at 180 C for 10-12 minutes or until the edges go slightly golden. Set aside.
For the filling, remove stones from nectarines and place them in the blender (I left the skin on). Meltdown cacao butter over low heat and add to the blender. Add all the remaining filling ingredients and blend until as smooth and creamy as possible.
Pour over the tart base and place in the fridge to set (will firm up in fridge but won’t go very hard and solid) once set, decorate with nectarine slices and raspberries. Slice and Enjoy.
Ingredients
Directions
For the base, mix all ingredients in a large bowl until sticky. Press down evenly onto the base and sides of the lightly greased round tart tin.
Bake in the oven at 180 C for 10-12 minutes or until the edges go slightly golden. Set aside.
For the filling, remove stones from nectarines and place them in the blender (I left the skin on). Meltdown cacao butter over low heat and add to the blender. Add all the remaining filling ingredients and blend until as smooth and creamy as possible.
Pour over the tart base and place in the fridge to set (will firm up in fridge but won’t go very hard and solid) once set, decorate with nectarine slices and raspberries. Slice and Enjoy.
Notes
Chocolate Fudge Tart
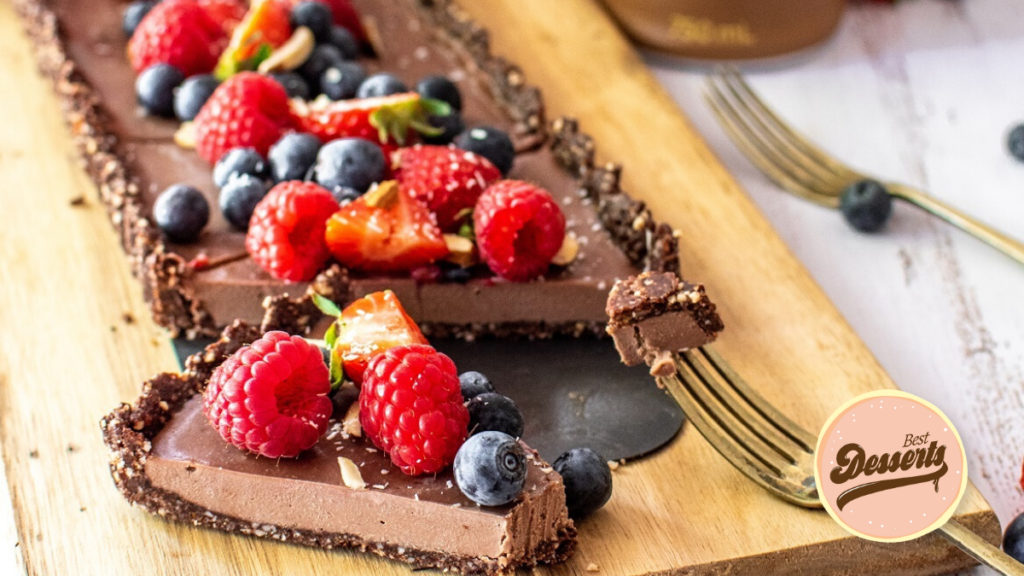
Process the nuts into fine pieces in a food processor.
Add in the Medjool dates and salt, and pulse until the mixture combines evenly.
Add a dash of syrup if extra moisture is needed to get the base to stick together.
Press into a cake tin. I used a rectangle quiche tin.
Drain and rinse the cashews well. Add them to a high-powered blender along with all the other filling ingredients and blend until completely smooth.
Pour into the base and smooth out. Place the tart into the freezer to firm up.
When ready to serve, decorate with fresh berries, almonds and coconut. Enjoy this slice after a few minutes out of the freezer, but for best results store in the freezer until ready eat!
Ingredients
Directions
Process the nuts into fine pieces in a food processor.
Add in the Medjool dates and salt, and pulse until the mixture combines evenly.
Add a dash of syrup if extra moisture is needed to get the base to stick together.
Press into a cake tin. I used a rectangle quiche tin.
Drain and rinse the cashews well. Add them to a high-powered blender along with all the other filling ingredients and blend until completely smooth.
Pour into the base and smooth out. Place the tart into the freezer to firm up.
When ready to serve, decorate with fresh berries, almonds and coconut. Enjoy this slice after a few minutes out of the freezer, but for best results store in the freezer until ready eat!
Notes

Leave a Reply