
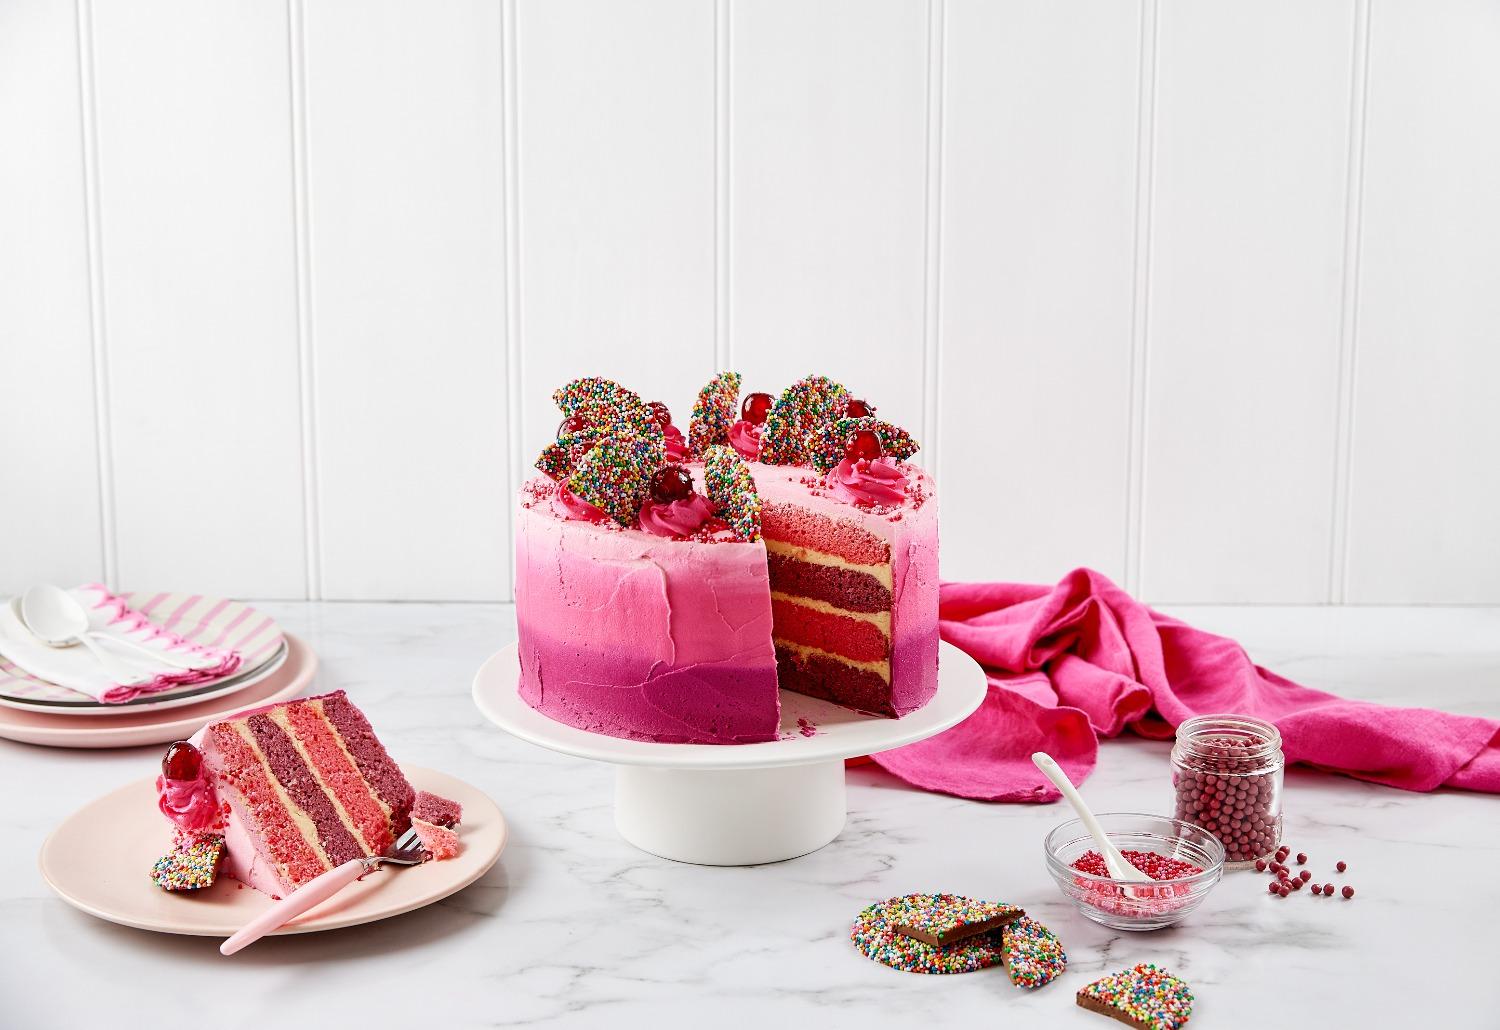
Planning a celebration for someone special? This show stopping celebration cake will steal the show at your next party, and tastes just as good as it looks!
Preheat the oven to 180C. Line the base and sides of two 23cm wide cake tins.
Attach the beater attachment to your KitchenAid mixer, beat the butter, caster sugar and vanilla extract until light and fluffy.
Add one of the food colours (following the packets instructions) to the batter, mix through until you achieve your desired colour.
Add one egg at a time while beating in between until well combined. Follow by adding the remaining egg white and lemon zest.
Gradually add in the plain flour, baking powder and baking soda while the stand mixer is on a low speed. Mix until it has just come together so its not over mixed.
Pour the buttermilk in gradually while the stand mixer is on a low speed, mix until just combined.
Divide the batter between the 2 cake tins and bake in the oven for 22-25 minutes or until a skewer comes out clean when tested.
Place the cakes on a cooling rack. After 20 minutes gently turn the cakes out to completely cool on the rack.
Repeat the recipe process for the remaining two cakes using a different food colour tone. Ensure the cake tins are cooled and completey cleaned.
To prepare the frosting, combine the butter and icing sugar into the bowl of a KitchenAid stand mixer with the beater paddle attached. Mix on low speed to start then turn up to medium speed once the ingredients are combined.
Add the vanilla and a pinch of salt.
Slowly add in the milk, if the frosting is too runny add a little more icing sugar.
To assemble the cake, start with the crumb layer. Trim the top of each cake using a bread knife to level it.
Place the first cake layer onto a serving plate. If you have a cake turntable place the plate onto that. If you don’t it can be done without as well.
Evenly apply a 1cm layer of frosting to the top of the cake. Using a flat icing spatular or a bench scraper to level it out.
Place the 2nd cake in a different colour on top and repeat the frosting process unit all 4 layers are stacked up. Ensure you leave frosting for the outside crumb layer.
Spread a thin layer on top and around the sides, using a bench scraper to ensure it is evenly applied and thin.
Place in the fridge to set for a min of 30 minutes or longer on a hot day.
To prepare the outer layer, repeat the vanilla frosting instructions.
Divide the frosting between 3 bowls and add the food colouring to create 3 different tones of colour (following the packets instructions). Mix through until you reach your desired colours.
Attach large standard piping nozzles to 3 piping bags (if you don’t have 3 nozzles, cut off the end of each piping bag instead). Fill each bag with one of the frosting colours.
Pip large dots in a line down the side of the cake every 10cm. Starting at the bottom in one colour until a third in height followed by the middle colour and the top being in the final colour. Once this is done, use the bench scraper to evenly scrap around the cake to achieve the horizontal rainbow.
Cover the top with the top colour and level it out.
Attach a large 1M piping nozzle and pipping bag, pip roses around the top.
Place in the fridge for a few hours to completely set firm.
When you're ready to serve; place the glacé cherries on top of the piped roses. Cut the large freckles in half and stick them in-between. Finish off with a sprinkle of hundred and thousands.
Ingredients
Directions
Preheat the oven to 180C. Line the base and sides of two 23cm wide cake tins.
Attach the beater attachment to your KitchenAid mixer, beat the butter, caster sugar and vanilla extract until light and fluffy.
Add one of the food colours (following the packets instructions) to the batter, mix through until you achieve your desired colour.
Add one egg at a time while beating in between until well combined. Follow by adding the remaining egg white and lemon zest.
Gradually add in the plain flour, baking powder and baking soda while the stand mixer is on a low speed. Mix until it has just come together so its not over mixed.
Pour the buttermilk in gradually while the stand mixer is on a low speed, mix until just combined.
Divide the batter between the 2 cake tins and bake in the oven for 22-25 minutes or until a skewer comes out clean when tested.
Place the cakes on a cooling rack. After 20 minutes gently turn the cakes out to completely cool on the rack.
Repeat the recipe process for the remaining two cakes using a different food colour tone. Ensure the cake tins are cooled and completey cleaned.
To prepare the frosting, combine the butter and icing sugar into the bowl of a KitchenAid stand mixer with the beater paddle attached. Mix on low speed to start then turn up to medium speed once the ingredients are combined.
Add the vanilla and a pinch of salt.
Slowly add in the milk, if the frosting is too runny add a little more icing sugar.
To assemble the cake, start with the crumb layer. Trim the top of each cake using a bread knife to level it.
Place the first cake layer onto a serving plate. If you have a cake turntable place the plate onto that. If you don’t it can be done without as well.
Evenly apply a 1cm layer of frosting to the top of the cake. Using a flat icing spatular or a bench scraper to level it out.
Place the 2nd cake in a different colour on top and repeat the frosting process unit all 4 layers are stacked up. Ensure you leave frosting for the outside crumb layer.
Spread a thin layer on top and around the sides, using a bench scraper to ensure it is evenly applied and thin.
Place in the fridge to set for a min of 30 minutes or longer on a hot day.
To prepare the outer layer, repeat the vanilla frosting instructions.
Divide the frosting between 3 bowls and add the food colouring to create 3 different tones of colour (following the packets instructions). Mix through until you reach your desired colours.
Attach large standard piping nozzles to 3 piping bags (if you don’t have 3 nozzles, cut off the end of each piping bag instead). Fill each bag with one of the frosting colours.
Pip large dots in a line down the side of the cake every 10cm. Starting at the bottom in one colour until a third in height followed by the middle colour and the top being in the final colour. Once this is done, use the bench scraper to evenly scrap around the cake to achieve the horizontal rainbow.
Cover the top with the top colour and level it out.
Attach a large 1M piping nozzle and pipping bag, pip roses around the top.
Place in the fridge for a few hours to completely set firm.
When you're ready to serve; place the glacé cherries on top of the piped roses. Cut the large freckles in half and stick them in-between. Finish off with a sprinkle of hundred and thousands.